The Comms tab on the CMS Dashboard houses the controls you will need for sending alerts, adjusting notification settings and creating custom emails.
Alerts let you send out notifications to your delegates during an event to keep them updated on schedule changes, or encourage them to visit certain sessions for example. They are a great way to keep your attendees fully up to date with your event, and drive engagement with things like surveys or activity feeds.
Alerts can be sent as in-app popups, emails and native push notifications (if you have distributed your app as a native build via the app stores).
Preparing alerts #
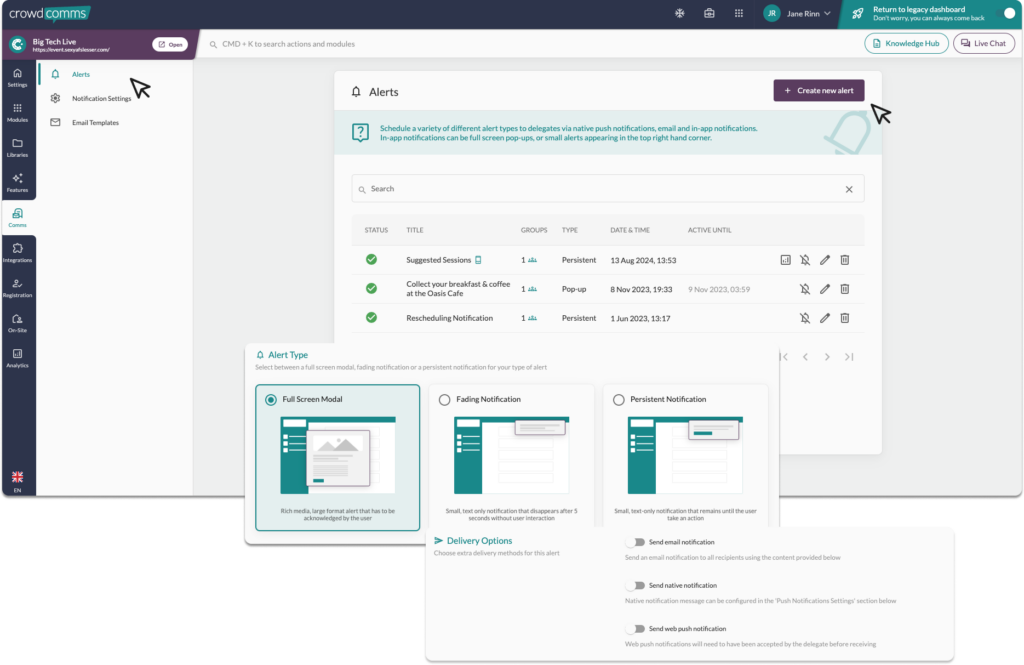
To start creating alerts, visit the ‘Comms’ section in the dashboard by clicking the speech bubble icon in the dashboard toolbar. From here you can view any alerts that have already been sent out, or create a new alert.
Enter a title and some text for your alert in the message box provided, you can elect to send your alert at a pre-scheduled time in the future or send it immediately. We recommend setting up alerts in advance wherever possible, so that the copy can be checked, or any last minute changes added before it goes out to your attendees. You can click the checkboxes underneath the description to decide how you want to send your alert. If you elect to send it as a native notification, you’ll need to enter a ‘plain text’ version of your alert, as native notifications don’t support formatting like bold or italic text.
Links #
If sending the notification as a push via a native app (if you have distributed your app as a native build via the app stores) you can add a ‘deeplink’ action taking the delegate to a specific place within the app when they tap the alert on their device.
Deciding who will receive the alert (Recipients). #
You can choose to send the alert to all users of your app, or a select few by assigning groups to the alert. If you decide to send it to a selection of groups, then those people will need to have signed in to the app at least once in order to receive the notification.
If you don’t specify any groups, then the alert will go out to all users of your app, regardless of whether they have logged in or not.
For native notifications, users will need to have confirmed that they wish to receive native notifications from your app when they first open it. If they decline this permission then the app cannot deliver native notifications to that user.
Alerts sent via email will go out to any designated attendees regardless of whether they have logged into the app yet and can be especially useful for pre-event communication. They follow the same rules as other alert types, so will go to all your attendees if you don’t specify and specific groups in the alert settings.
Delivery #
Alerts are usually sent out as soon as they are due but with all things on the internet, they may take a little while to arrive. This can be down to a number of factors including available capacity on the platform and internet speeds at the event venue. If you’re experiencing any issues sending alerts out, contact your account manager who’ll be happy to assist.
Notification Settings #
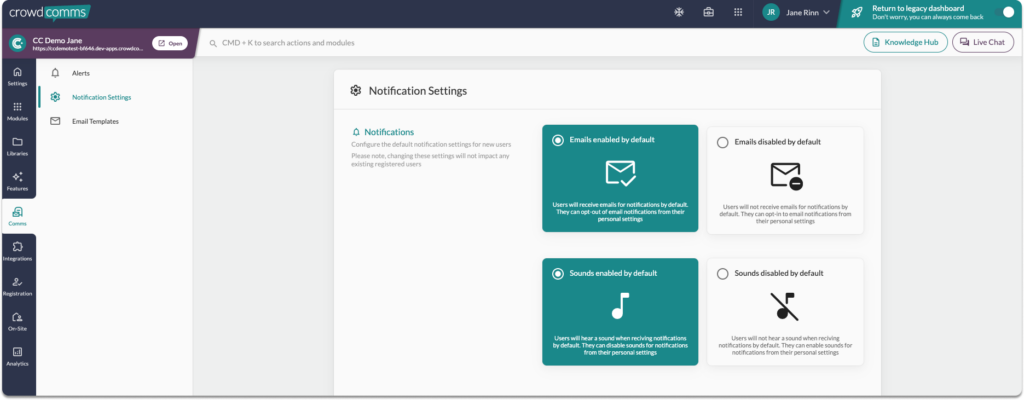
To configure the notifications settings for your App, go to the ‘Comms’ tab on the CMS and notifications in the secondary menu. We advise setting these up before launching your app, any changes made after the launch will only apply to new joiners of the app.
Notifications: #
- Enable/Disable Emails: Users will receive emails for notifications by default. They can opt out of email notifications in their personal settings in the app.
- Sounds Enabled/Disabled: Users will hear a sound when they recieve notifications by default. They can disable this setting in their personal app settings.
Web Push Notifications #
Web push notifications are messages sent from a website or web application to a user’s device when a PWA (Progressive Web App) is installed or when using the Native App, even when the user is not actively browsing the site. These notifications can appear on desktop or mobile devices, typically in the form of small pop-up alerts, banners, or messages that appear outside of the browser window.
Users will get the option to opt-in to native-style notifications when using the web or PWA version of your event app on both desktop and mobile devices, they can adjust these settings in their app.
Enable Push Notifications #
Within the Comms Tab on the CMS, in Notification settings scroll down to ‘Web Push Notifications’. From here you can toggle the ‘Web Push Notification’ to on, they are currently switched to off by default.
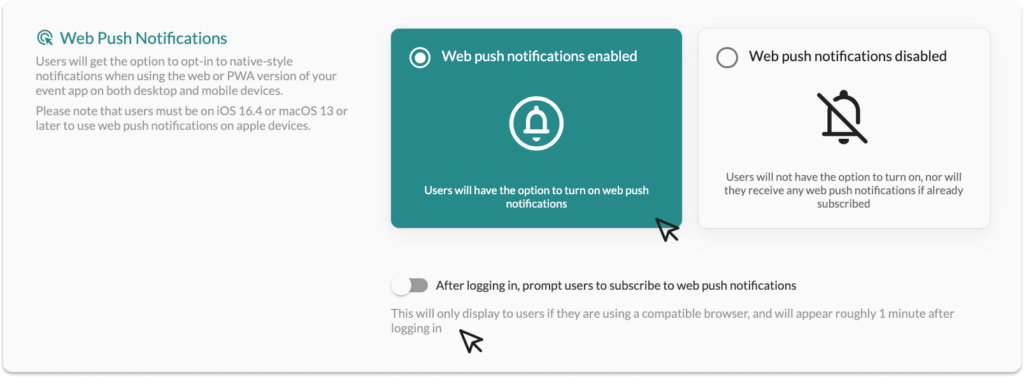
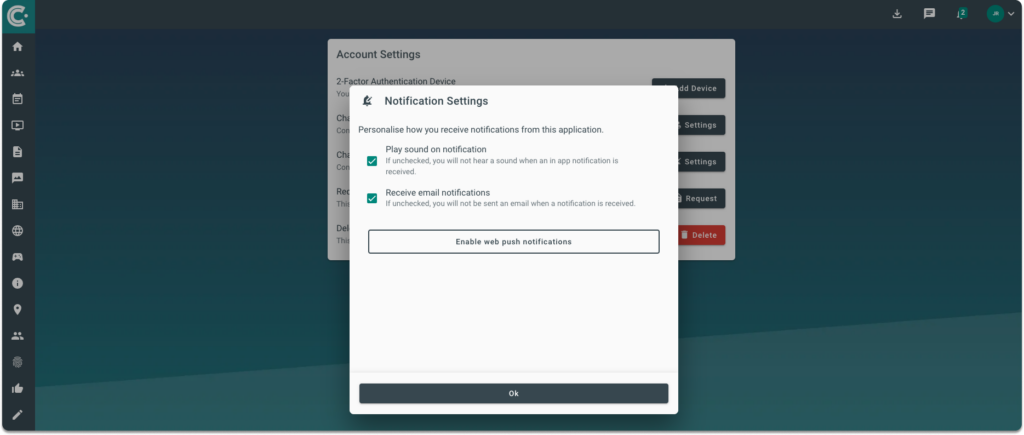
Beneath the tile toggle there is a slider toggle, which when enabled will prompt the user to subscribe to the push notifications. This will open the modal shown below. A user can unsubscribe at any time by navigating to the account settings in their app.
Please note:
- For more information on how to install a PWA please see here.
- For more information on setting up a PWA in the CMS please see here.
- Users must be on iOS 16.4 or macOS 13 or later to use web push notifications on apple devices.
- User must “Allow” notifications in the browser and on their device in their settings to be able to receive push notifications.
- If the ‘Prompt users to subscribe to push notifications’ toggle is enabled, the prompt will only display to users if they are using a compatible browser, and will appear roughly 1 minute after logging in.
- Users may need to reinstall the event app as a PWA if they have added the PWA before this setting has been enabled.
- Please note PWA installed via a custom domain does not currently support push notifications, push notifications only work on PWAs using the crowdcomms domain, please contact a member of staff to find out more.


