Overview #
When an event reaches full capacity, this feature ensures that interested registrants can still express interest by joining a waitlist.
How It Works for Attendees #
- Once registration is full, visitors will see a “capacity reached” page instead of the standard registration form.
- If the waitlist is enabled, they’ll have the option to join the waitlist by providing their name and email address.
- After joining, they’ll receive a confirmation message and email acknowledging they’ve been added to the waitlist if configured in registration emails.
- If a spot opens up, organisers can follow up with waitlisted individuals via the registrants page in the CMS.
Set Up #
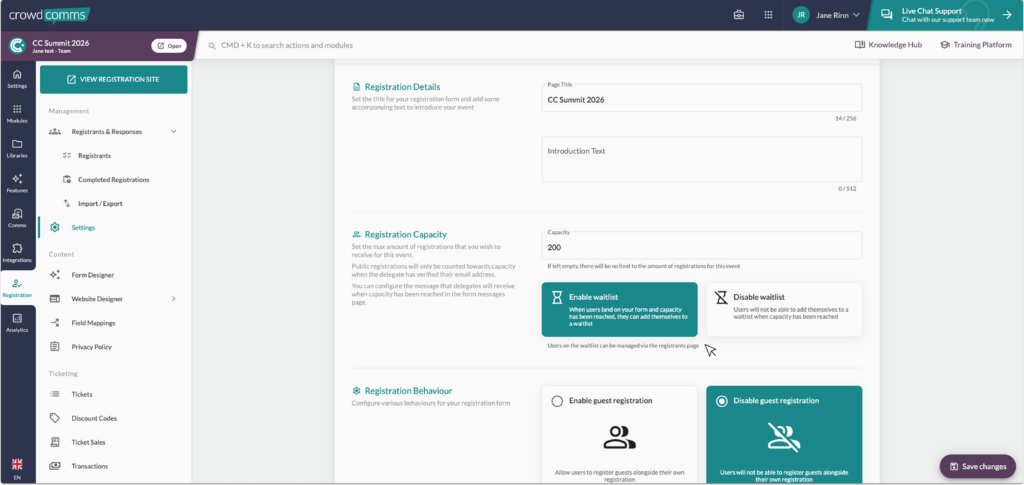
- Navigate to the registration settings page within the CMS. Here you can set your capacity, and toggle on ‘Enable Waitlist’.
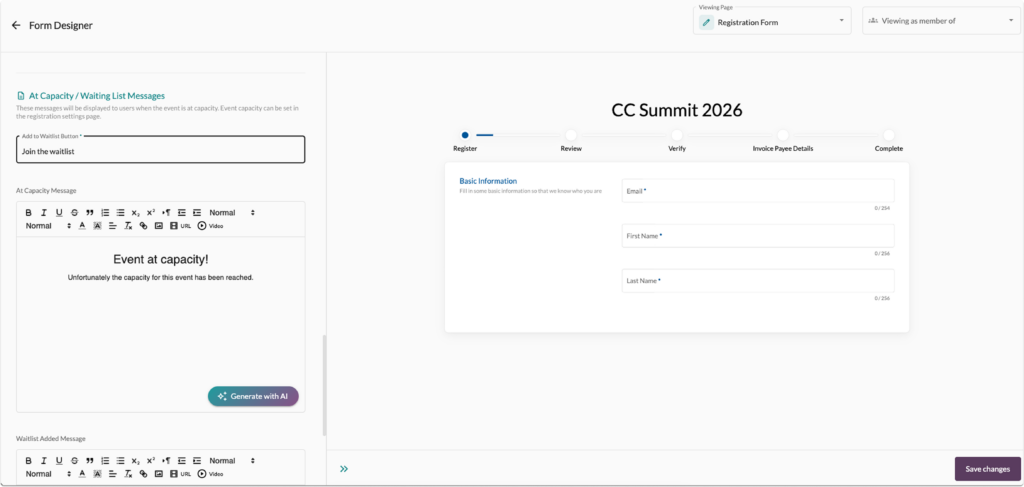
Navigate to your registration form designer. Within the designer, navigate to the ‘Text’ tab and scroll down to the ‘At Capacity / Waiting List Messages’, and populate your waitlisting message. Save your changes.
3. Once waitlists are enabled, a waitlist email template will appear in the registration templates section, and a corresponding delivery rule will also populate on the email delivery rules page. You may want to customise these before setting your registration to live. For more information regarding sending emails, please see here.
Managing your waitlist #
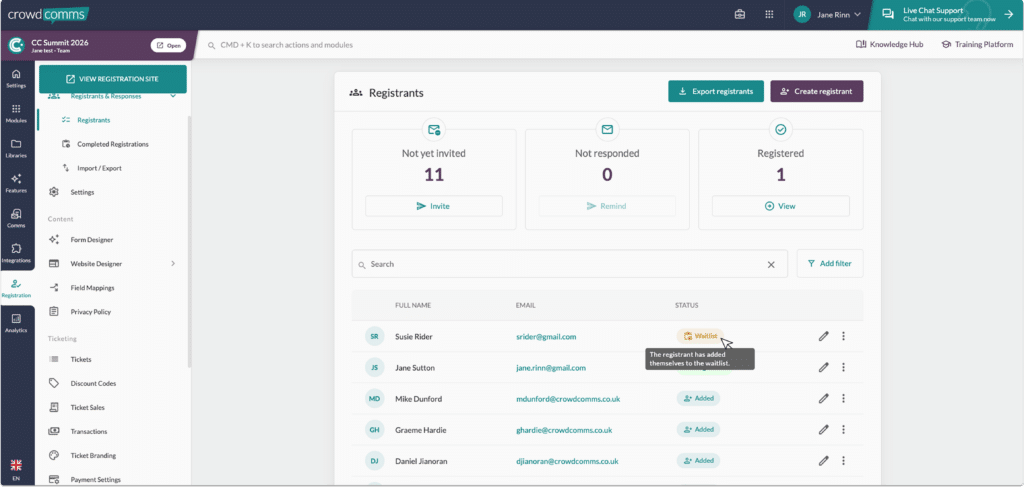
- Once someone has added themselves to the waitlist, you will be able to view this on the ‘Registrants’ page in the CMS. As shown below, they will have a waitlist status.
2. When capacity has increased, you can manually invite them to register by clicking the 3 ellipses next to their name, and sending them another invite email. Please note their status will not change to ‘Invited’ once they are on the waitlist, and will only update once they register.
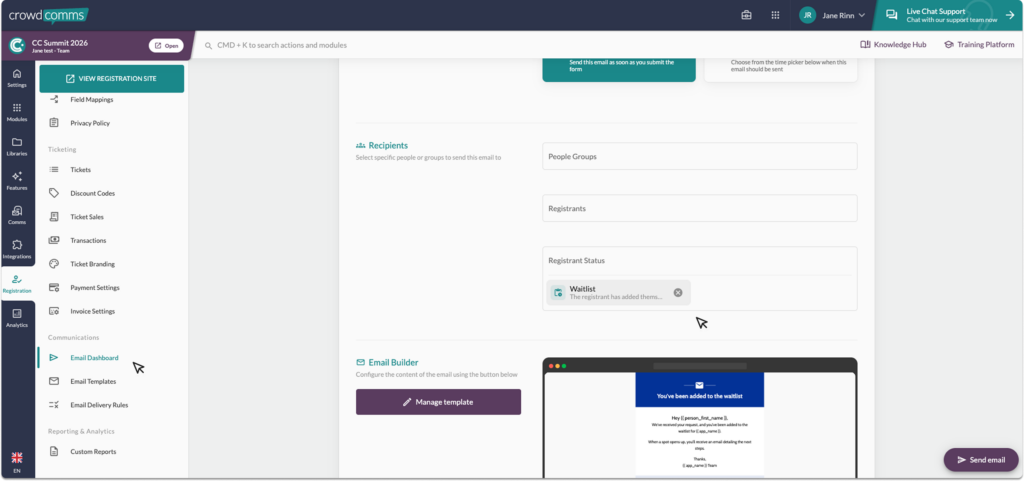
3. You can send a bulk email to everyone on the waitlist when a spot opens up via the Registration Email Dashboard. Navigate to the dashboard and select ‘Send New Email’. Then, choose the email template you wish to send and target the waitlist status in the email settings, as shown above.
Please note #
You will need to be using new registration emails to use this feature. For more information regarding registration emails, please see here.


