Default Section and Icon Functions #
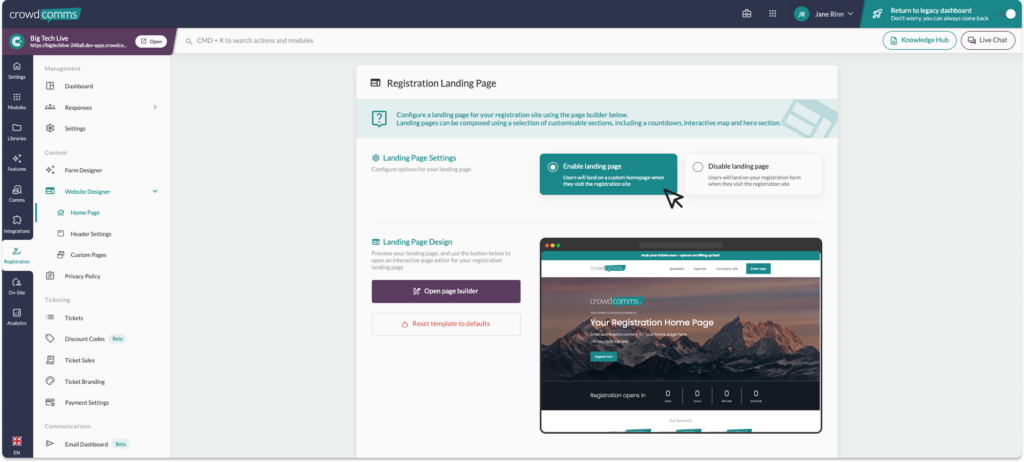
To start creating the registration home page, navigate to the Registration tab. Then within the Content section on the secondary menu, click Website Designer, then Home Page.

You will see the Page settings and the Page Design sections on this page.
On the Landing Page settings, you have the option to either Enable or Disable the landing page.
If you select to enable the landing page, the users will land on the custom homepage when they visit the registration site.
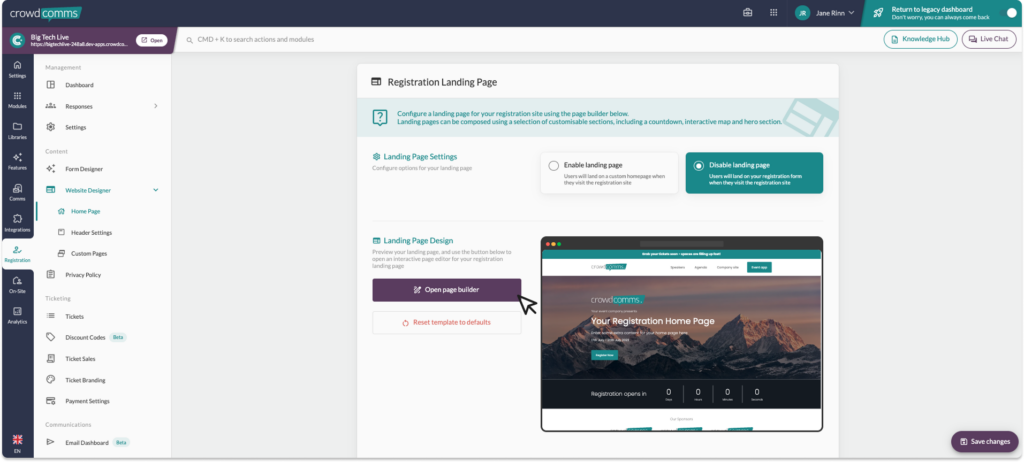
If you select to disable, the users will land directly on the registration form when they visit the registration site.

If you select to enable the landing page, it is time to get designing – – click on the ‘Open page builder’ button on the Landing Page Design section.
Editing the Home/Landing Page Template #
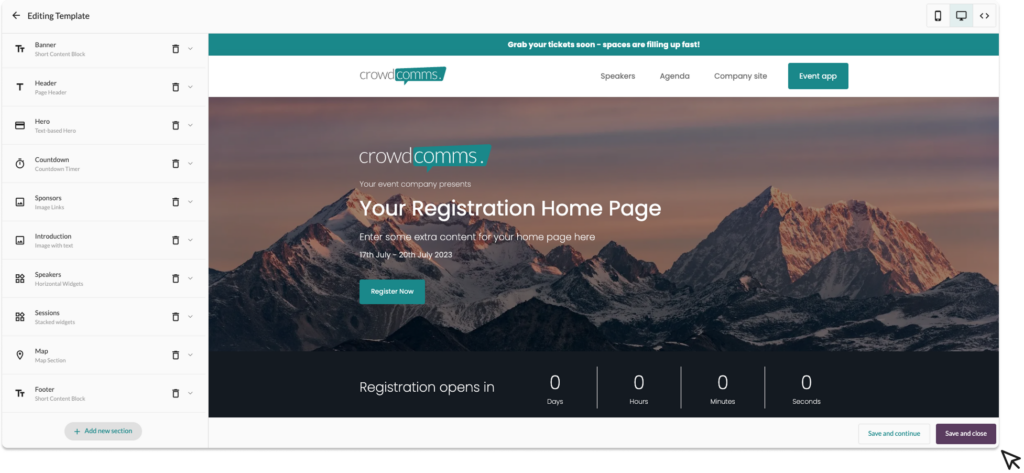
After clicking on the ‘Open page builder’ button, you will land on the default template.
In this template, we have added several useful sections, including a header, a countdown timer, the sponsors banner, and the speaker’s section, to name a few.
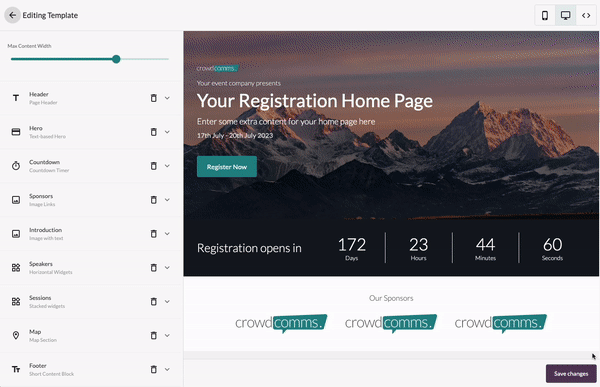
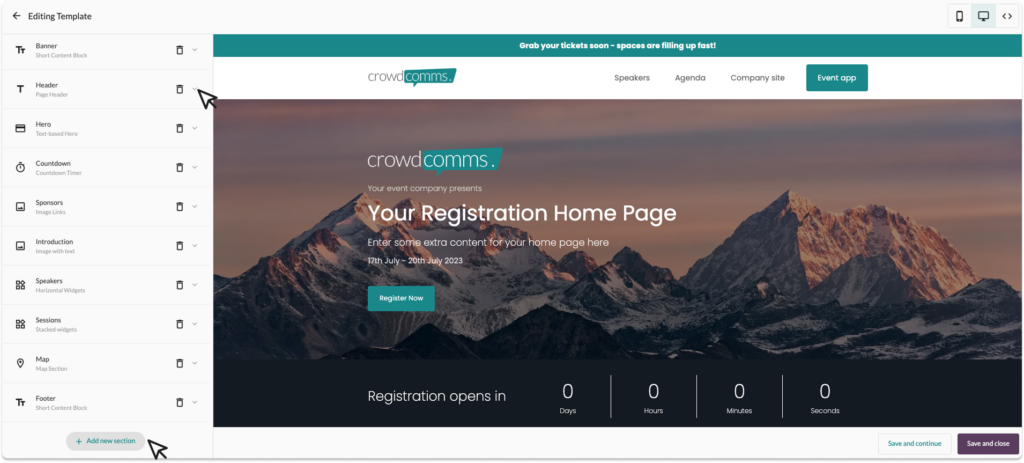
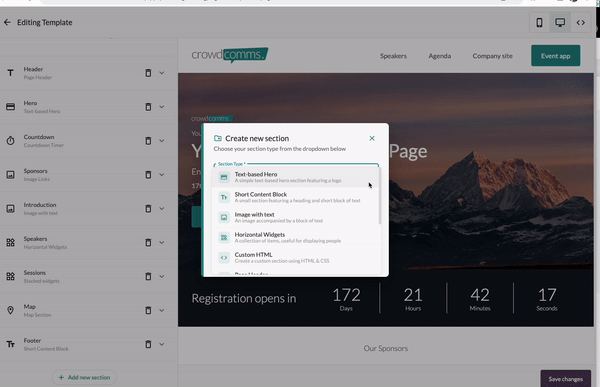
You can add additional sections to your page by clicking on the ‘+ Add new section’ button, which can be found at the bottom of the section editor list.
Now, let’s see how to edit an existing section. To edit, click on the ‘v’ icon to expand the editor.
Depending on the section, you’ll be able to:
- Upload images such as a logo, background, or profile photo of the speakers.
- Set the colours of the background, widgets, radius and text.
- Add call-to-action buttons and navigation items, which will take the users to different sites.
- Add short text within the Heading, Description and Subtext fields.
- Write long text in the rich text editor field.
- Adjust the image size, width, and height as well as the text alignment and size.
- Add a date and time to enable the home page to countdown towards the registration open or expiry date, or the event date.
There are different section types for you can choose from:
- Video Hero: A simple video based hero featuring a logo.
- Text with Video Hero: A video accompanied by a block of text.
- Text-based Hero: Features a logo with attention-grabbing text and a call-to-action button.
- Short Content Block: A heading and a short text block within a small section.
- Image with Text: Section with an image accompanied by a block of text.
- Horizontal Widgets: Display a collection of items, which can be useful for displaying people.
- Custom HTML: Allows you to create a custom section using HTML or CSS.
- Page Header: Display a header with a logo, a call to action and navigation links.
- Map Section: Display a full-sized Google map spanning the full width of the page.
- Countdown Timer: This allows you to add a live countdown for your registration.
- Stacked Widgets: Display a collection of stacked widgets, which can be useful for displaying agenda.
- Image Links: Ideal for displaying the sponsors of the event.
- Video Background: Ability to set video background on individual sections.
You can add as many sections as you want. Please note: the more sections you add to the Home Page, the longer it will be.
Once you’ve finished editing the template, don’t forget to click ‘Save Changes’!
Please Note: #
- If you wish to use the Custom Pages functionality, you will need to enable the Global Header in the Header Settings tab, and delete the header section from this page, to prevent duplication of headers on your webpage.


