Now that you have your registration form and landing page built, it is time to invite users to start registering.
Before You Start #
Please ensure you have all the relevant features enabled (such as Guest Registration and/or Invoicing) before starting your registration set up or template design, to prevent any issues.
Before we begin editing the templates, navigate to the registration tab in the CMS, and select ‘Registration Settings’. Scroll to the bottom, and choose between Legacy or the New Email systems, any app created after May 1st 2026, will automatically be set to use the new email system.
The new registration email system provides improved functionality and reliability, and will become the default in the future.
Please note:
- Enabling Invoicing or Guest Registration must be done before toggling on the new emails system, to ensure templates for these features will be generated.
- If you select to use new emails you will not be able to revert back to use Legacy Emails.
- If you move from legacy to the new email system, customised subjects, bodies, and any extra templates will be migrated to the new system but any data on the email dashboard will be lost.
Getting Started #
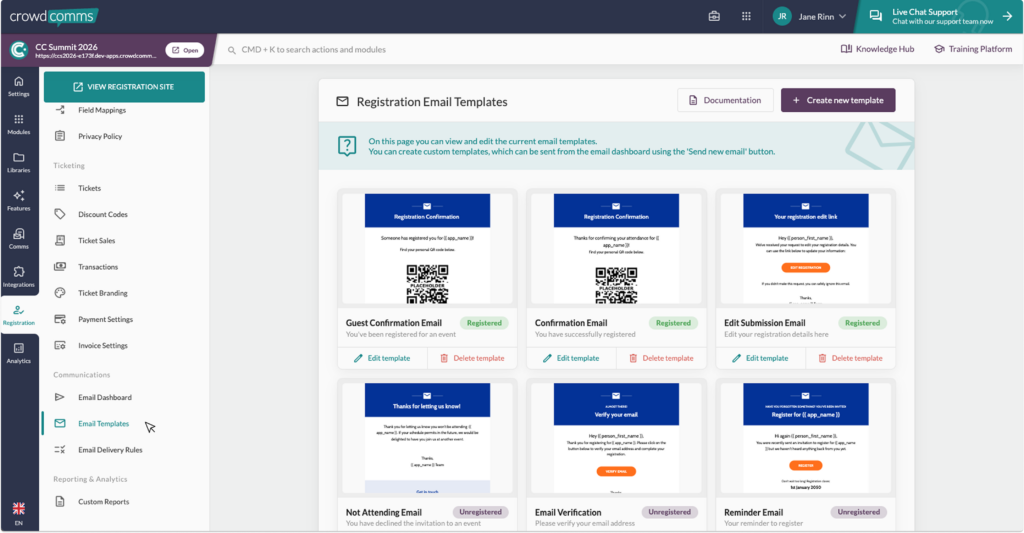
To begin editing your template, navigate to the Communications section within the Registration tab. Here you will see the ‘Email Templates’ menu item – select this to view all the email templates available to you.
As a default, you will have five email templates, and they are:
- Invitation Email
- Reminder Email
- Verification Email
- Confirmation Email
- Not Attending Email
- Edit Submission Email
Depending on the features you have enabled, you may also see templates for:
- Invoicing Emails
- Guest Registration Emails
Click here to learn about these individual templates.

To edit these templates, navigate to the Registration tab, then within the Communications section on the secondary menu, click ‘Email Templates’.
You can also start an email from scratch. To do this, click on the ‘Create new template’ button which can be found at the top of the page. Then click here to find out how to send the email from a bespoke template.
On the top of the page, you will see five horizontal tiles, and these tabs divide these different templates.
To edit a specific template, for example, the Invitation Email, simply click on the respective tab ‘Edit Template’.
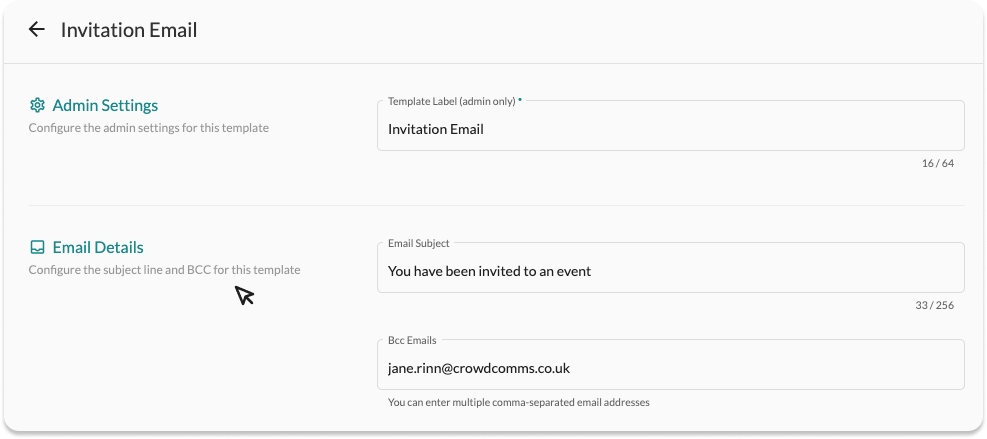
You will then see three sections. The first section allows you to edit the subject of the email, which will appear as the headline of the email. The next one allows you to choose recipients to Bcc into the email. Lastly is the template builder itself.
To edit your email, click on the ‘Launch email editor’ button.
As a standard, we offer a visually captivating template ready for immediate use with minimal adjustments required. Remember to modify the contact details (phone number and email), and the company name in the footer, and your email is ready to be sent.
Alternatively, you can personalise your own template to meet your own event branding and design criteria.
When using the email template editor, you can utilise the following tools to create a beautifully designed template:
- Columns – Allows you to add columns for a different layout.
- Heading – Add headings to capture the attention of your readers.
- Text – A built-in tool so you can add text.
- Image – Add images to make your design more attractive.
- Call-to-action button – Add any type of button in your email. Change the colour and styles to match your branding.
- Divider – Gives you appropriate spacing at any point in your email.
- HTML – Add custom HTML to customise your design even further.
- Menu – Enables you to create navigations menu.
- QR Code – Provides a generated code for specific circumstances which can be selected via the drop-down on the tool
- Merge Tags – Allow you to pull in personalised information about a delegate or registrant to an email template. To use merge tags, simply click on the block of text you wish to edit, and a toolbar will appear. From here you can select your merge tag from a drop down list. The list of options will be pulled from the people library or from the answers provided at registration. Answers from the registration form will be prefixed with the word ‘form’.
To preview how an email appears in an actual inbox, you can send a test email.
Font Compatibility #
Please note that not all fonts are supported across all email clients. While you may select a custom font for your design, some email clients do not support web fonts, and will instead display a fallback system font. This means that your chosen font may render differently depending on the recipient’s device or email platform.
For the most reliable display across all major email clients including Gmail, Outlook, Apple Mail, and Yahoo, we recommend using web-safe system fonts. These fonts are more commonly supported and provide the best chance for cross-client compatibility.
Most Commonly Supported Fonts: #
- Arial
- Helvetica
- Verdana
- Tahoma
- Trebuchet MS
- Georgia
- Times New Roman
- Courier New
We highly recommend sending a test email, especially if you are creating a custom email design, to check it renders correctly in the frontend of the email provider. Please ensure your email provider is updated to the latest version to ensure compatibility.
When you are happy with the template and the outcome of your edits, click the ‘Save changes’ button.


