Overview #
Welcome to the future of seamless attendee management! This guide introduces a powerful new feature: the Salesforce Integration, designed to bridge the gap between your event data in our CrowdComms CMS and your Salesforce CRM.
This integration empowers you to effortlessly synchronise attendee information by connecting your Salesforce account to the CMS. You can automate the flow of crucial data, eliminating manual entry and ensuring data consistency across platforms.
Key Capabilities Include:
- Effortless Connection: Easily link your Salesforce account with our CMS through a dedicated integration tile, featuring a streamlined setup process.
- Customised Data Mapping: Tailor the integration to your specific needs by mapping Salesforce field keys to the People Library’s profile fields and custom fields within our CMS, allowing you to keep contact details up to date while also recording badge prints and session check-ins!
- Dynamic Group Management: Leverage the power of dynamic groups to automatically segment your audience based on Salesforce data. Create or utilise existing groups based on dropdown and checkbox selections, ensuring precise targeting.
- Automated Contact Creation: Seamlessly integrate with Salesforce to ensure every contact is instantly captured and synced between platforms.
Part 1: Setting up the Connected App in Salesforce #
To use this feature, you will need to first contact your CrowdComms Account Manager to get your access enabled.
2. On the next page, navigate to the left sidebar menu and select Apps, then within the sub menu select App Manager. This will open a list of existing Apps for your Salesforce Account.
On the right side of the window, select the New External Client App button

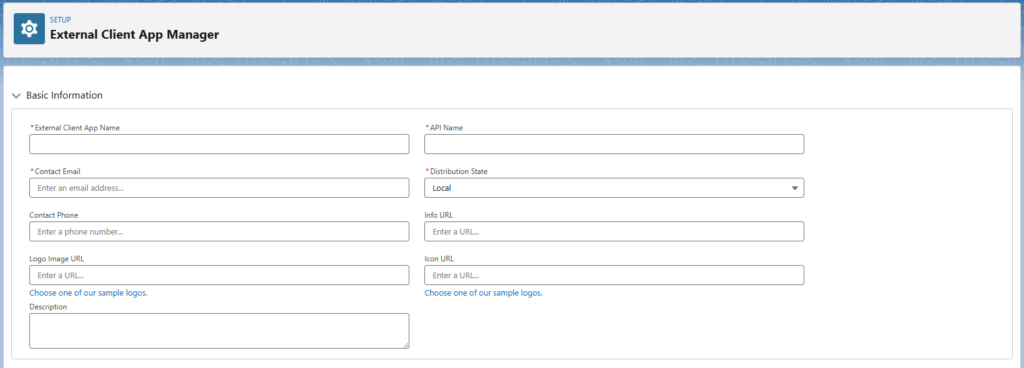
3. This will open a form for your new app
In the Basic Information section, complete the following:
- External Client App Name (can be anything recognisable to you)
- API name (will auto fill from the client app name)
- Contact Email
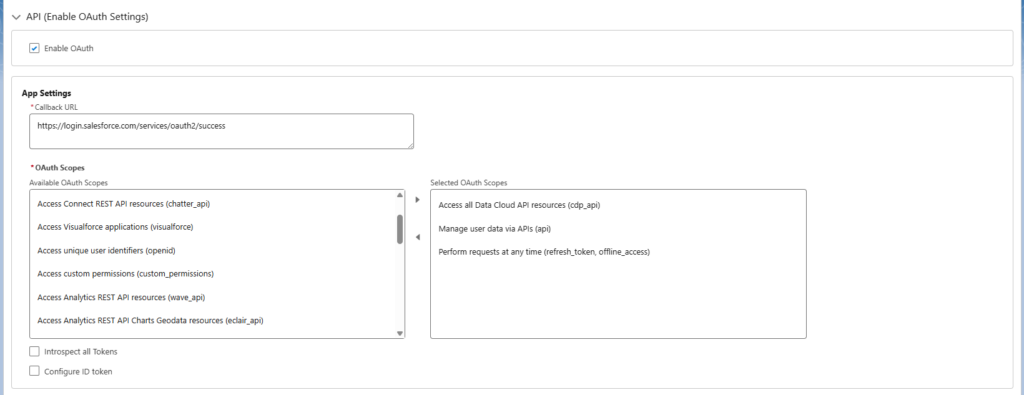
4. Scroll down to the API (Enable OAuth Settings) section and expand the card. Check the box to Enable OAuth.
Under App Settings complete the following:
- Callback URL: https://login.salesforce.com/services/oauth2/success
- Set the OAuth Scopes to determine the level of access you would require, for our integration we recommend the following scopes:
- Access all Data Cloud API resources (cdp_api)
- Manage user data via APIs (api)
- Perform requests at any time (refresh_token, offline_access)
Once you have entered all of the above details you can scroll to the bottom of the page and click Create.
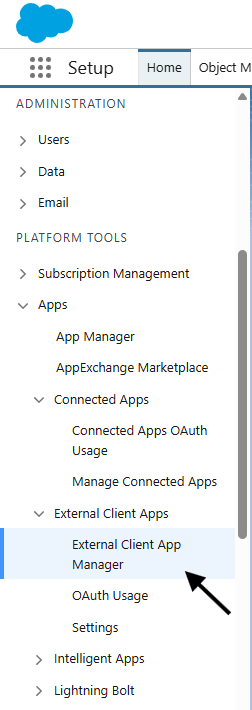
5. Navigate back to the External Client App Manager page using the menu on the left side of the screen as shown.
6. Select the App you just configured, and select the Edit button to the right of the Policies tab.
7. In the OAuth Polices section under Permitted Users, set the dropdown to Admin Approved Users are Pre-Authorized, and select OK in the dialogue box.

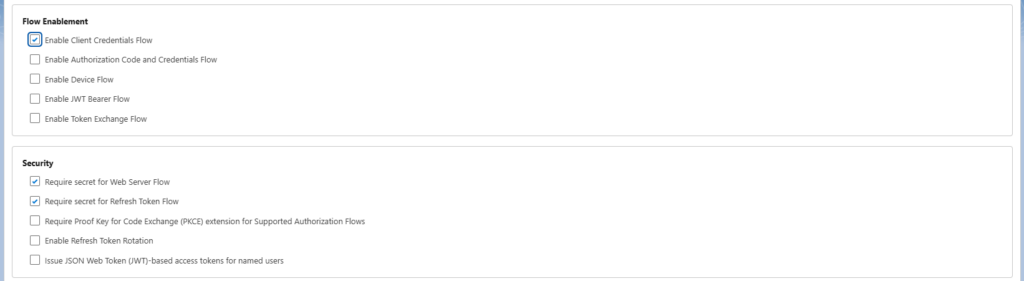
8. Scroll down to the OAuth Flows and External Client App Enhancements section, and check the Enable Client Credentials Flow box. Enter the email address of an appropriate user. When the integration runs it will run as this user, so this user will need to have the appropriate access levels applied.

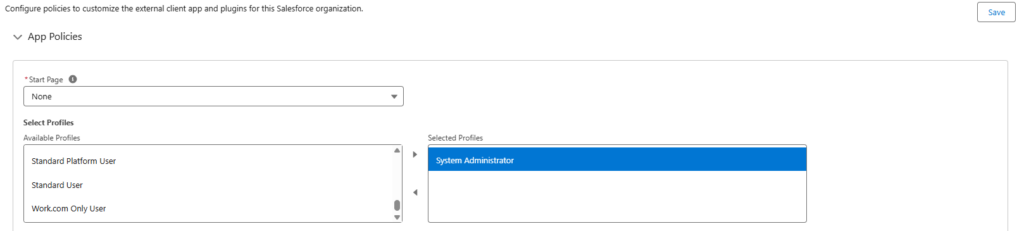
9. Next scroll to the top of the page. In the Select Profiles section, select the roles that are assigned to the ‘Run As User’ you chose in the previous step. These roles will be mirrored here. In this guide, the ‘Run As User’ I selected has the System Administrator role on their profile, so I’ve chosen ‘System Administrator’ from the list. Then click save.
For the next few steps, you will be taking note of several pieces of information. Be sure to have notepad or similar open on your computer to make these notes.
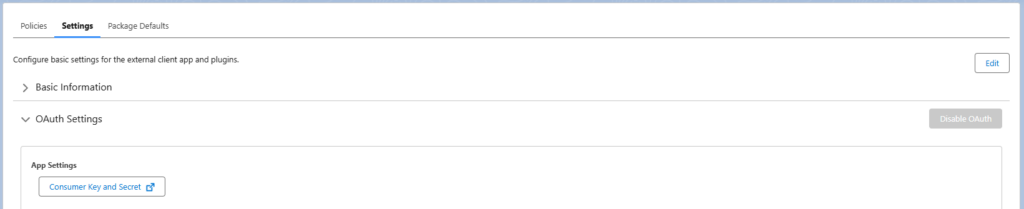
10. In the top tabs, select Settings. Scroll down and expand the OAuth Settings section and click the Consumer Key and Secret button to the left.
11. If required, verify your identity and then copy the Consumer Key & Consumer Secret somewhere safe. We will use these later. You can close the tab once the key and secret are noted down.
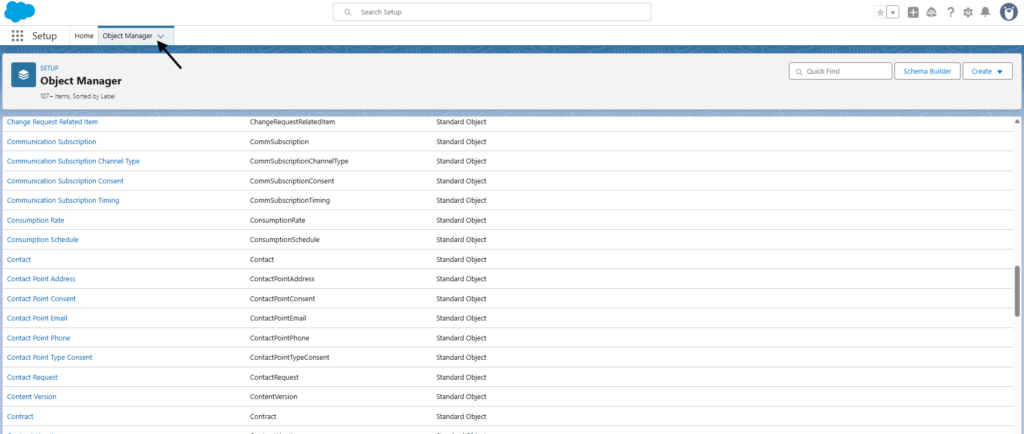
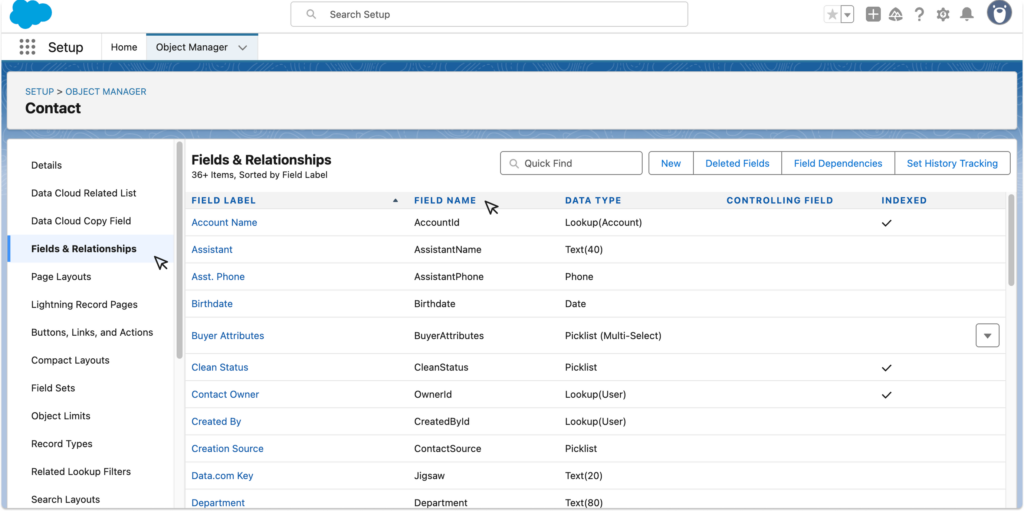
12. To get the Contact Object Name for the CMS (this will be the table where you wish to extract the data from in Salesforce to go to the CMS) open the Object Manager tab, and scroll to find the label you require. Copy the API Name field (in the second column) and save to the notepad.
13. Next you will need to click on that label, for this guide we have chosen the Contact label and within the details page open Fields & Relationships from the left side bar menu. Here you will find the external mapping IDs required for the CMS for each data field you wish to map over. Simply copy over the Field Name for the data fields you wish to map to the CMS.
Part 2: Enabling the Integration in the CMS #
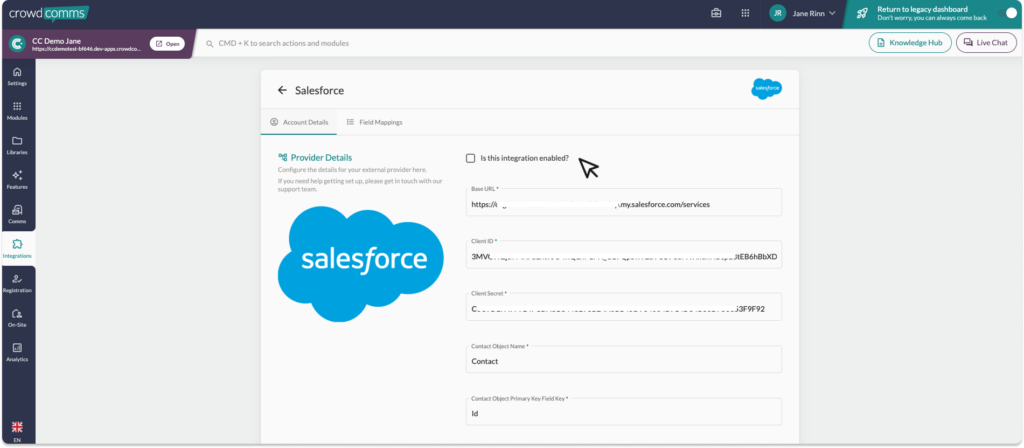
1. You are now ready to enable your integration in the CrowdComms CMS. Go ahead and login, and navigate to the Integration tab on left navigation menu, then select the Salesforce Integration Tile.
2. If your Account Manager or member of staff has enabled this integration for you, a dialogue box will open.
3. Here you can add your Base URL which is the Salesforce organisation URL for example: https://YOURORGANISATIONHERE.my.salesforce.com/services
4. Next copy over your Consumer Key to the Client ID field and the Consumer Secret to the Client Secret field that you saved in your notepad earlier.
5. Then, paste in the Contact Object Name, and enter the value Id to the Contact Object Primary Key Field Key input fields (unless set to something else in your Salesforce).
6. Press Submit
You will be redirected to the integration settings page
6. You can choose to enter a Filter Query into the Filter Query input box. This will enable you to filter your data as it syncs through to the CMS using Salesforce Object Query Language (SOQL).
7. Select the checkbox ‘Allow the creation of new contacts in the integration’ if this is enabled people/contacts in CrowdComms CMS who do not already exist in your external CRM will be created in your CRM.
8. Leave the checkbox Allow Syncing? unchecked for now.
9. Click Save changes on the bottom left
Field Mappings
You are now ready to begin mapping your fields between Salesforce and the CMS.
- Navigate to the Field Mappings tab and select Create Mapping.
- In the dialogue, enter the Salesforce Field Key from the page we opened in Part 1 step 13 into the External Key input box and select the Mapping Type from the dropdown menu. You can choose from:
- Profile Field: Fname, Lname, Suffix, Email, Phone, Title, Job Title, Company, Address, Location, Website, About.
- Custom Field: These will be Custom Fields already created in the CMS. For more information on Custom Fields please see here.
- Dynamic Group: This field will be mapped to an existing group, if a group does not exist one will be created.

3. Next you can set the Mapping Direction from the drop down. You can choose from:
- Outbound: Send data from CrowdComms to your external provider.
- Inbound: Send data to CrowdComms from your external provider.
- 2way: Keep data in sync between CrowdComms and your external provider.
- Symbolic: Link a person from CrowdComms to your external provider without sending data.
Please ensure you map an email field from Salesforce to the CMS, as this will work as the unique identifier for each delegate’s information. The integration will not run without an email mapping field.
4. Continue to map out your fields until you are satisfied, these will autosave as you progress.
5. You can now navigate to the account details page, and check the box to enable the integration and save changes. The sync will automatically begin to run at intervals of 30 minutes on a predefined schedule. The integration will fail to run if you have entered an External Key that does not exist in Salesforce.
Outbound Event Mappings #
Outbound event Mappings link events that occur in the CrowdComms system to a specified field within your external provider. For these fields to sync, an email field must be linked either in the field mappings page or the email field in account details.
- Navigate to the Outbound Events tab within the SalesForce Integration page.
- Select the Create Mapping button.
- In the drop down select from one of two event types:
Attendance Tracked: Update a field in your external provider when a delegate checks in to a session.
Badge Printed: Update a field in your external provider when a delegate prints a badge
- Enter the External ID captured from SalesForce(See step 13 in part 1 of this guide to see where to find this ID in Salesforce). Select the External Field Type, this will be what is entered into SalesForce you can choose between:
- A Boolean : Writes True or False to Salesforce.
- Date Time: Writes the date/time of the event.
- Please note you will need to have Kiosks or Attendance Tracking enabled to avail of this feature. Please speak to your Account Manager to set this up.
Activate the sync #
To activate the sync to automatically begin to run – navigate to the account details tab and select the Allow Syncing check box, and Save Changes. The integration will run every 30 minutes.
Run Logs #
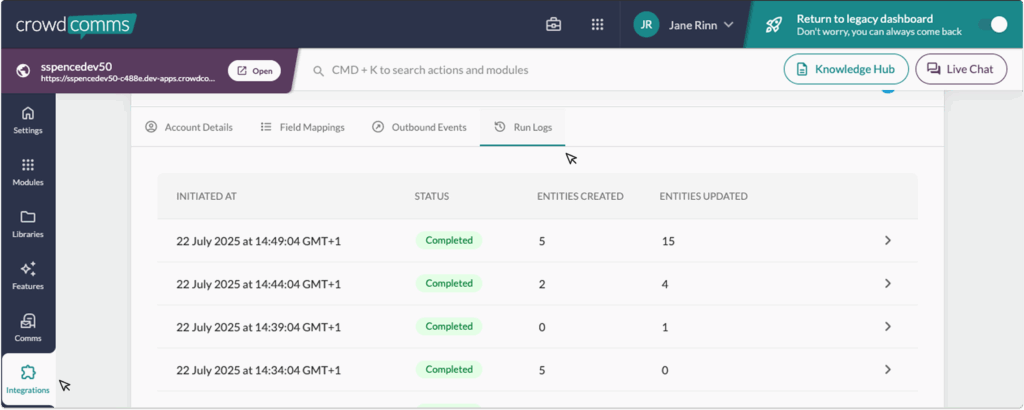
Run Logs are available in the CMS under your integration’s configuration settings. To access them, go to the Integrations tab in the left-hand menu, select your integration, and if it’s set up, you’ll be able to navigate to Run Logs.
The Run Logs will show you information on the latest sync of the integration. You can view how many entities were created, how many entities were updated, and the time and date of each sync or ‘run’ of your integrations.
Please Note #
- Contact sync is limited to 2,000 records. If you anticipate needing more, reach out to support for assistance.
Should you need any assistance with this integration, please don’t hesitate to reach out to a member of the support team on Live Chat available via the CMS.


