Epson TM-C3500 Setup Guide #
- Download the “TM-C3500 Printer Driver (64bit)” from https://support.epson.net/setupnavi/?PINF=swlist&OSC=WS&LG2=EN&MKN=TM-C3500
- Run the installer (you do not need to have the printer connected to the device
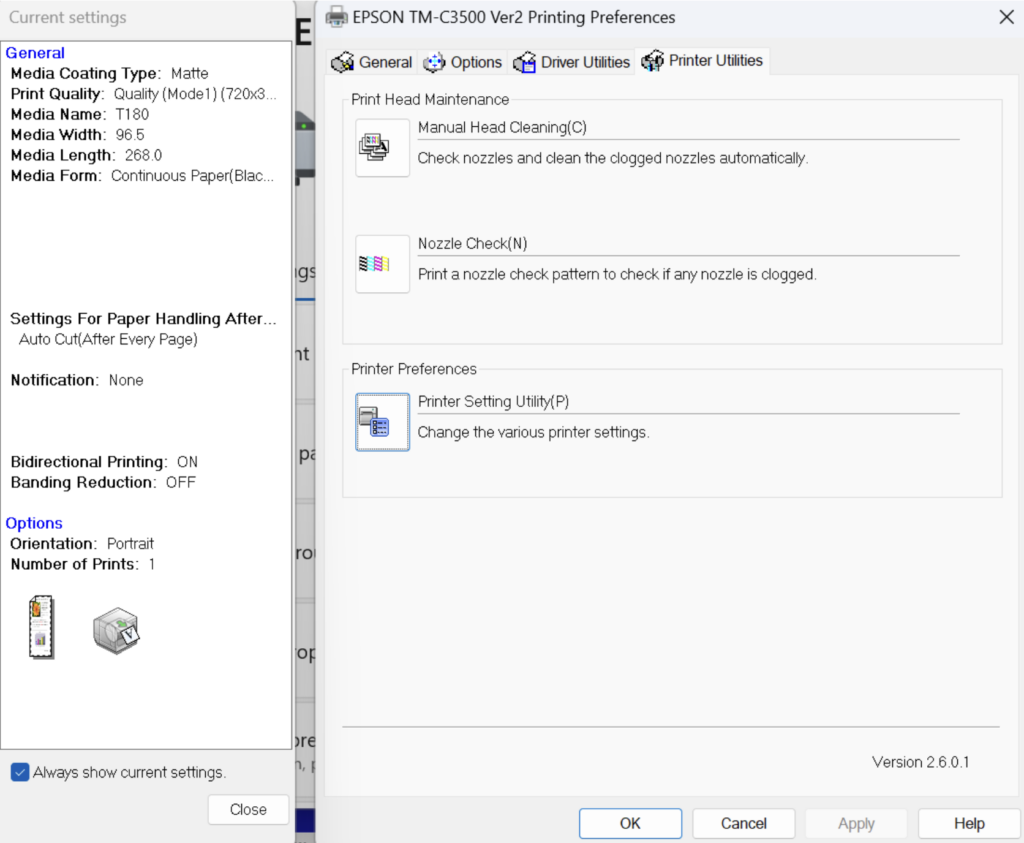
- Go to the printer utility settings (Settings>Bluetooth & Devices>Printers & Scanners>Epson TM-C3500 Ver2>Printer Preferences>Printer Utilities>Printer Setting Utility(P)
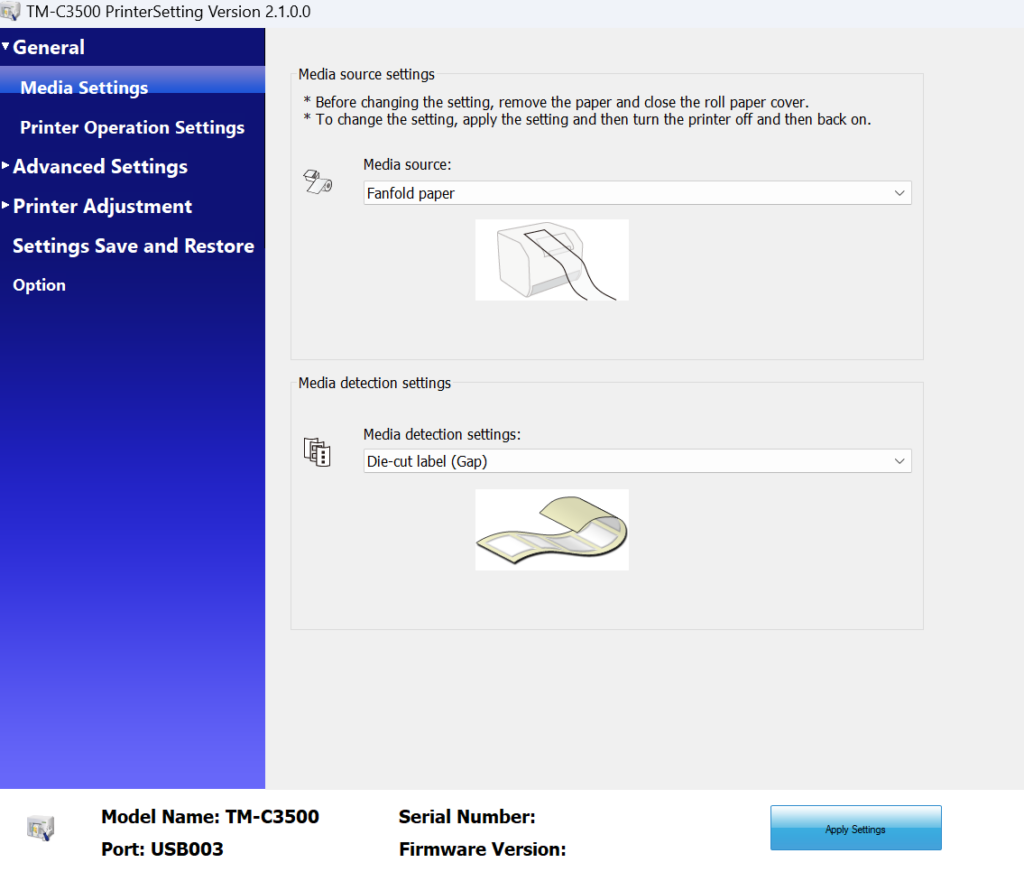
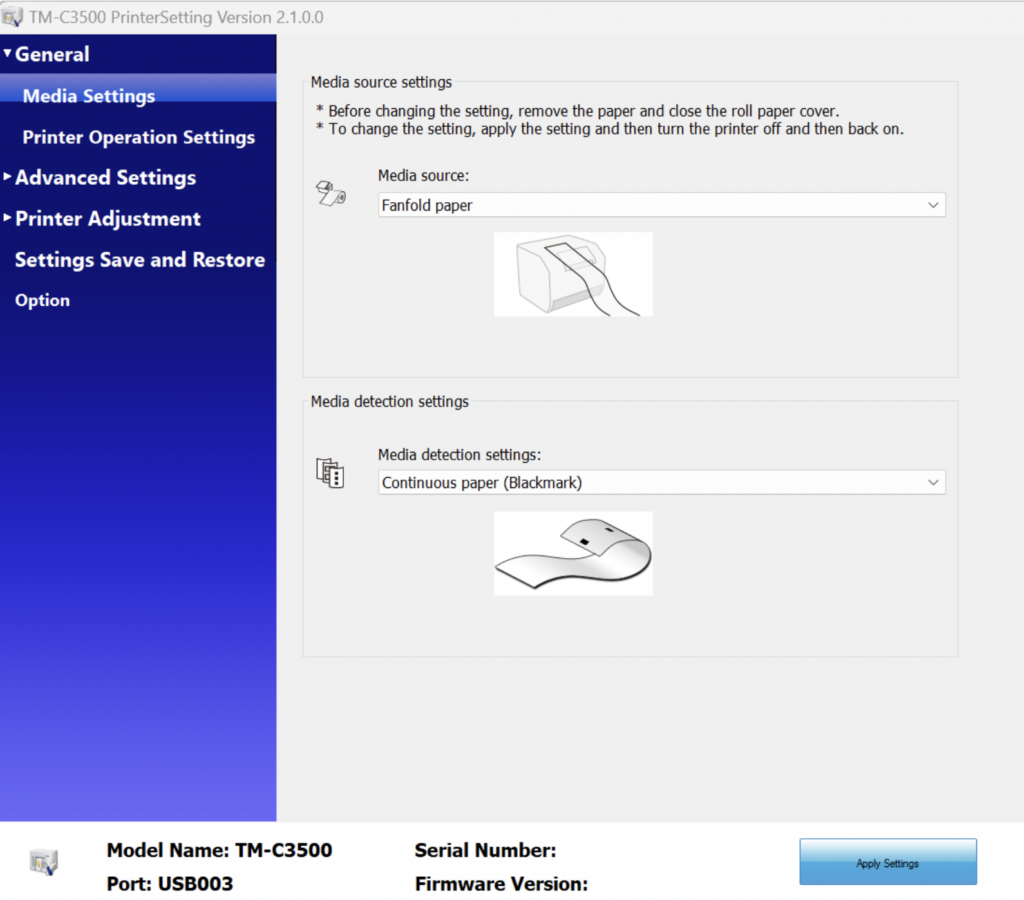
- Change Media Source to “Fanfold paper”, and Media detection settings to “Continuous paper (Blackmark)”
- Switch the printer off and on again to save as Fanfold (a small F should show on the printer screen)
- Close Printer Setting Utility window
- On Printer Preferences window, go back to General page
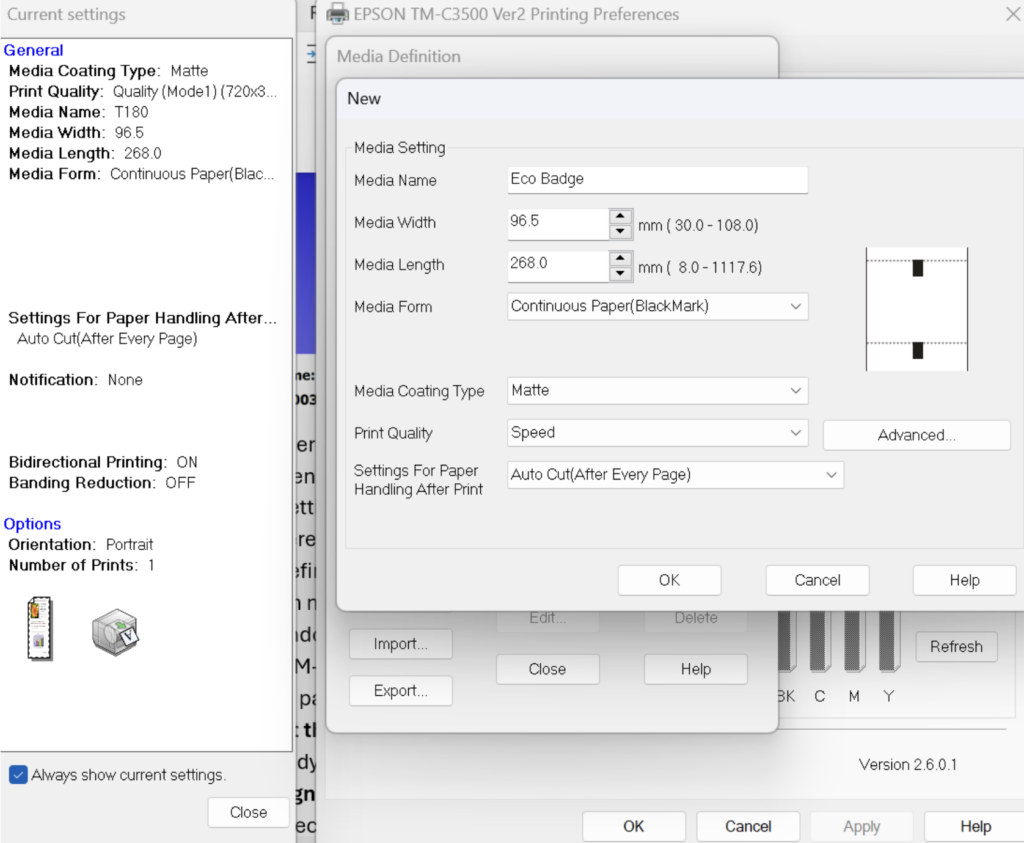
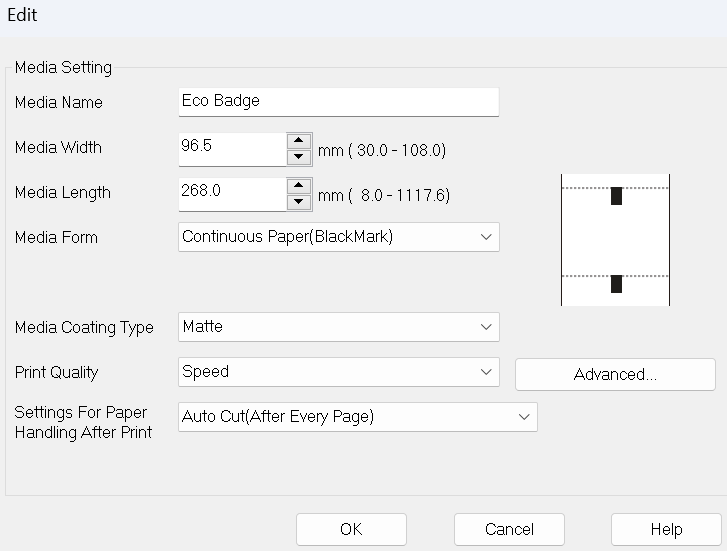
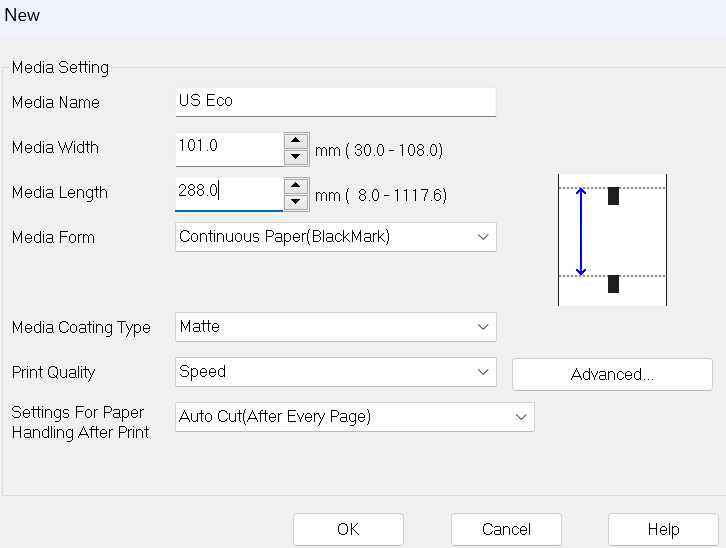
- Under Media Definition, create a new badge with the following sizing
- In the dropdown menu, select you new badge. Click OK to close the Printer Preferences window
- Set the Epson TM-C3500 Ver2 to the default printer
- Load the Badge paper into the rear of the printer. The blackmark must face down and be at the front of the badge!
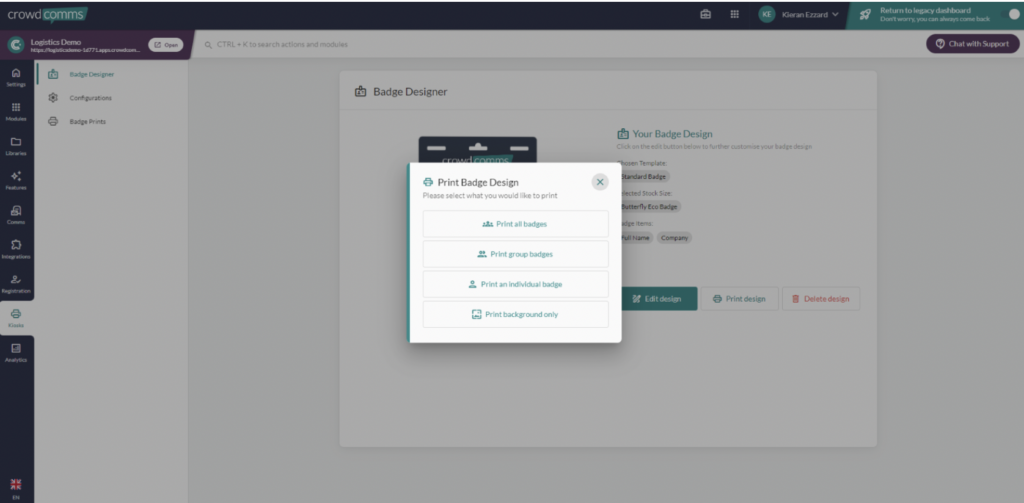
- You are now ready to print a badge. Go to the Kiosks section on the CMS and click Print design. From here Print an individual badge. If you badge has not printed out correctly, check steps 4 – 9 have been completed correctly.
Click here for a video guide on how to set up the printer.
Printer settings for our different types of badge stock can be found here.
Badge Size Settings #
UK Eco Stock #
US Eco Stock #
Sticky Butterfly stock #

For this you also need to change the Media detection settings in Printer setting utility(P)